
Ten Tips for Taking Great Pet Pics
If you are anything like me, you love your pets. Of course, when you love your pets as much as I do, you want to take photos of them that you can be proud of. These photos will become keepsakes in years to come and something that you will look back on and say “oh I remember that day…”.
We all also like to share our photos with family and friends.
I am by no means a professional photographer (trust me, I only use automatic on my SLR and most of my pics are actually taken with my phone). However, being a pet parent to the number of critters I have, there are a couple of things I have picked up.
Below are 10 points that I think are useful to remember in Pet Photography
Number 1:
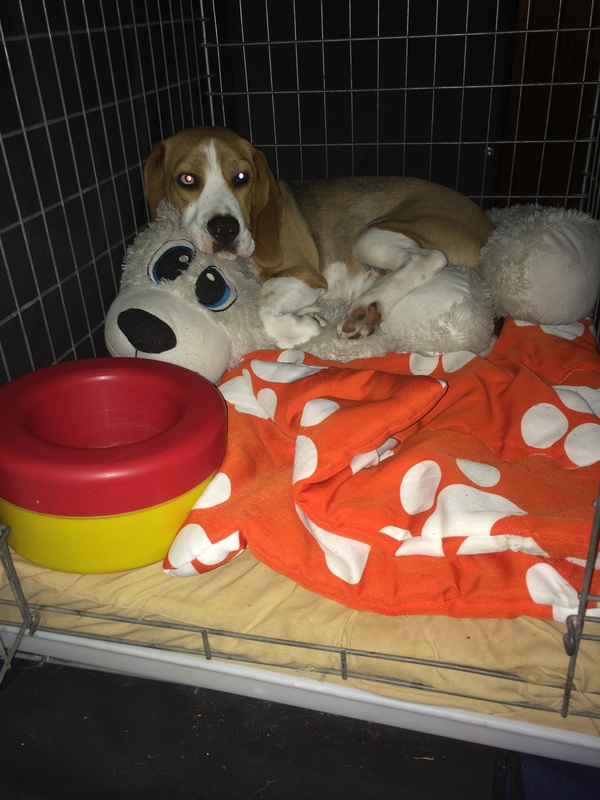
Have your camera/phone with you. Ok, I know this is probably pretty obvious – but think how many times you have thought “I wish I had my camera”. It’s pretty hard to take the cute pic of your puppy asleep on your foot, when your camera/phone is in another room (or even just out of reach).
Number 2:
Condition your pet to like the camera. With today’s technology and such great cameras in our smart phones you can often get away with taking sneaky photos. However when it comes to using an SLR camera with lens etc, this can actually be quite scary for some pets. Teach your pet to like the presence of your camera by pairing this with their favorite treats/toys. Dogs and cats generally love BBQ chicken, birds can be rewarded with sunflower seeds, millet sprays, small pieces of fruit etc, rats love tinned cat food, guinea pigs love corn husks (equivalent of guinea pig chocolate).
If you are going to use flash photography, you will also need to condition your pet to the flash.
We all also like to share our photos with family and friends.
I am by no means a professional photographer (trust me, I only use automatic on my SLR and most of my pics are actually taken with my phone). However, being a pet parent to the number of critters I have, there are a couple of things I have picked up.
Below are 10 points that I think are useful to remember in Pet Photography
Number 1:
Have your camera/phone with you. Ok, I know this is probably pretty obvious – but think how many times you have thought “I wish I had my camera”. It’s pretty hard to take the cute pic of your puppy asleep on your foot, when your camera/phone is in another room (or even just out of reach).
Number 2:
Condition your pet to like the camera. With today’s technology and such great cameras in our smart phones you can often get away with taking sneaky photos. However when it comes to using an SLR camera with lens etc, this can actually be quite scary for some pets. Teach your pet to like the presence of your camera by pairing this with their favorite treats/toys. Dogs and cats generally love BBQ chicken, birds can be rewarded with sunflower seeds, millet sprays, small pieces of fruit etc, rats love tinned cat food, guinea pigs love corn husks (equivalent of guinea pig chocolate).
If you are going to use flash photography, you will also need to condition your pet to the flash.
|
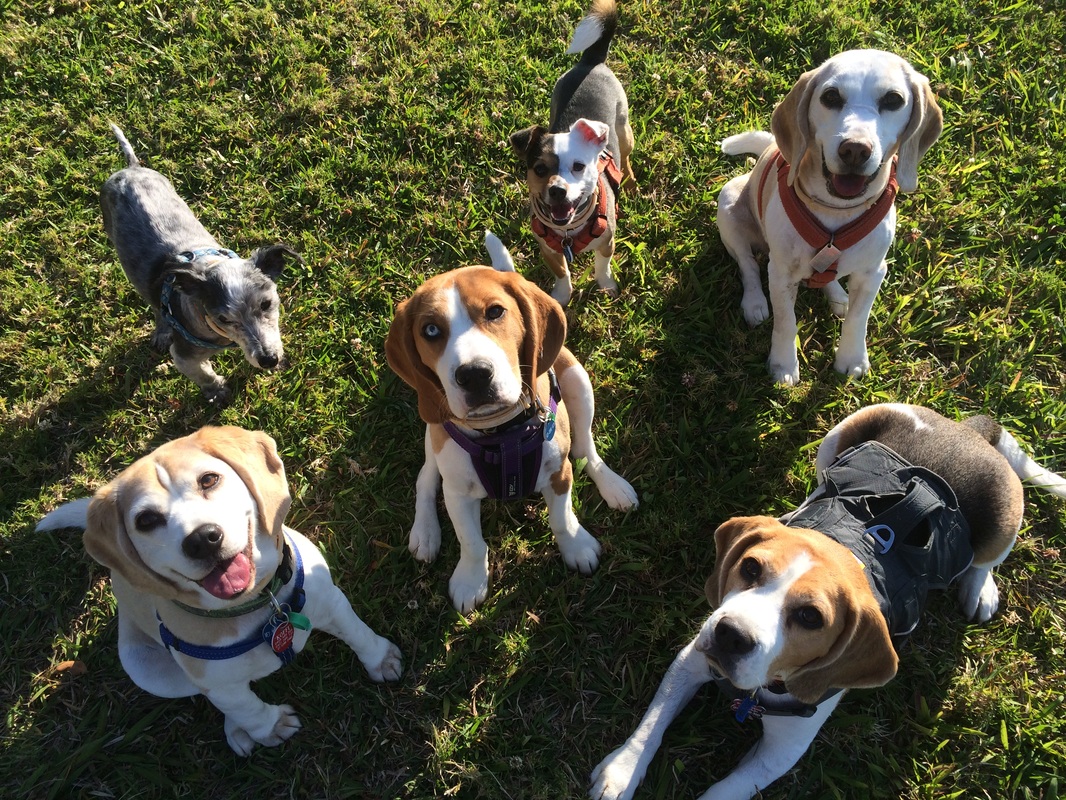
Number 3:
Teach your pet some basic cues. Having a reliable sit/down, stay and look is incredibly useful when it comes to taking portrait pics of your dogs. With cats, birds and other pets, teach them to “station” on an object. A raised object will help with this, and you can heavily reward them for being in this position. |
|
|
Number 4:
Consider your location and background. You don’t want a busy background as this will take away from your pet’s pic. Plain backgrounds, such as grass, water, neutral floors/walls are often better and add to the photo rather than take away. |
|
|
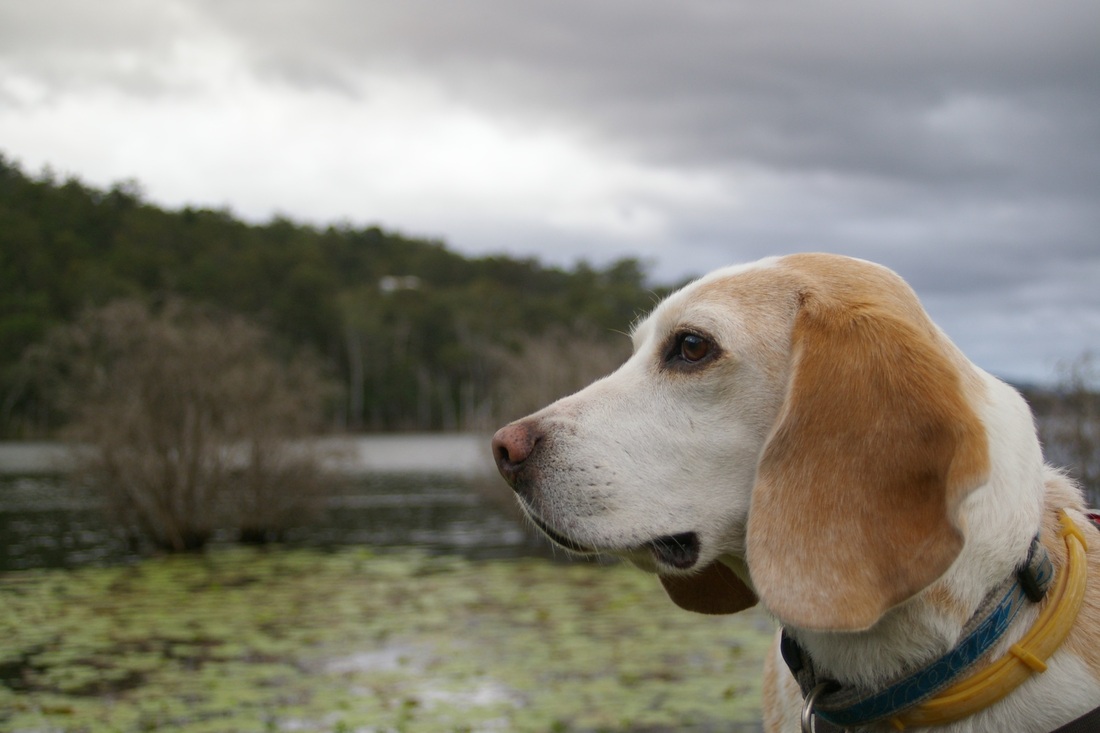
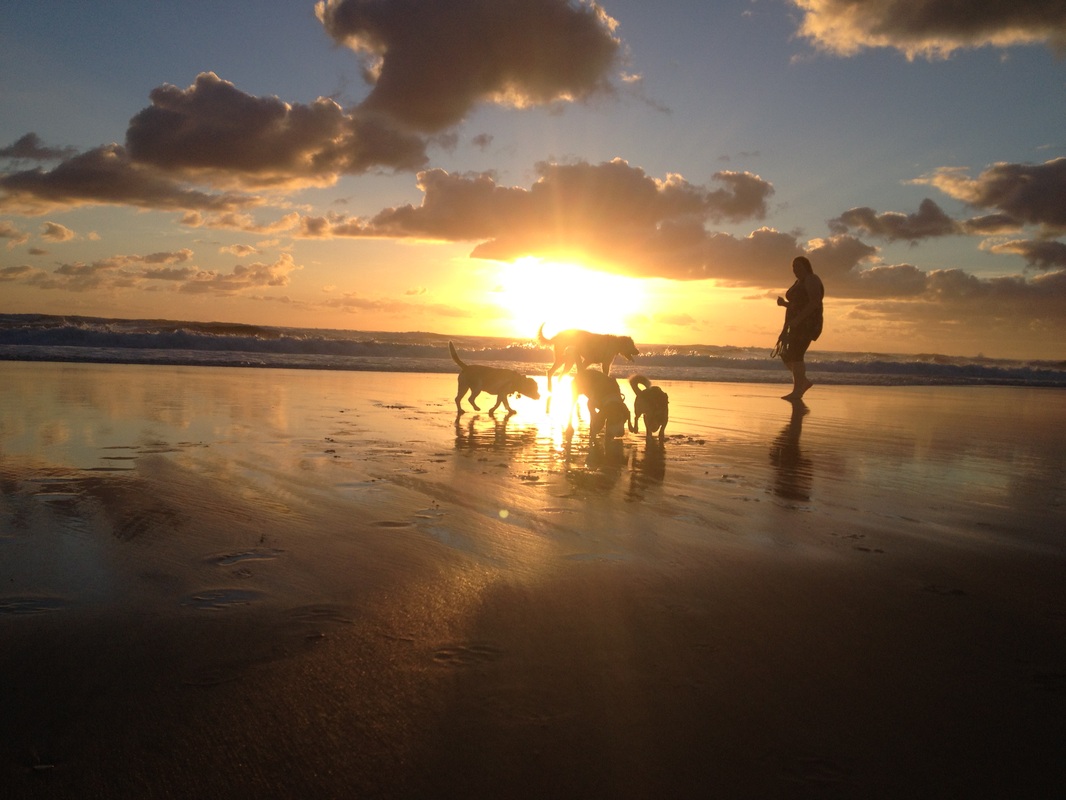
Number 5:
Lighting is also important. Bright natural lighting is often best. This allows photos to be clear and crisp. When taking outdoor photos, watch for shadows that cover your pet’s face or body and take away from the shot. You can sometimes use the backlight of the sun to your advantage and take silhouette style photos. If taking indoor photos or using flash photography, try bouncing the light off a wall or floor instead of directly at your pet. Otherwise, the light may reflect straight out of your pet’s eyes and give you that evil dog/cat look. Do you know why some pet’s eyes reflect green and others red?
This is due to the light reflecting surface in the eye known as the tapetum lucidum (this is an adaptive feature of night hunting animals). In some pets the tapetum lucidum is present, resulting in the green colour with flash photography, and in others it is thinner or absent resulting in less or no reflection, and the red colour (same as seen in human photos) with flash photography. Humphrey (my beagle) has one eye with the thinner tapetum – he can look particularly freaky in night time direct flash photos. Blue eyes are less likely to have the tapetum lucidum. |
|
Number 6:
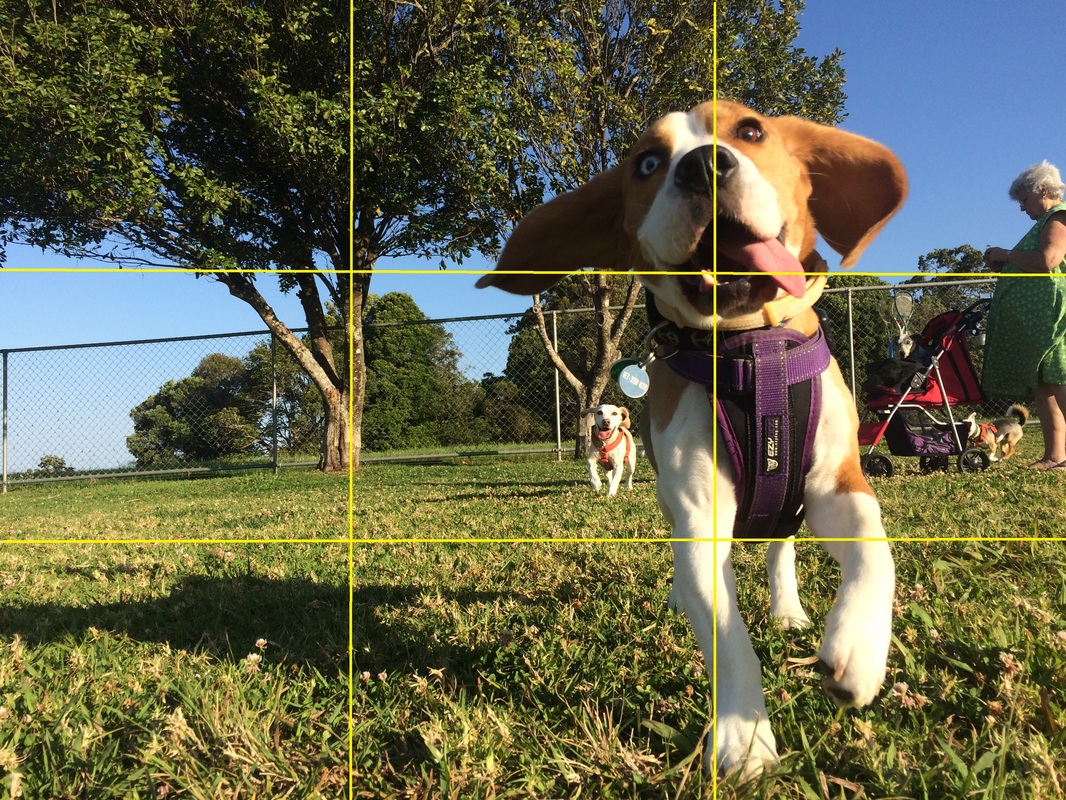
Remember the rule of 3rds.
This rule stems from the theory that we naturally look at intersection points when an image is split into thirds.
Using the rule of thirds – aim to divide your photo into thirds using two imaginary vertical and horizontal lines – making three rows & three columns (total of 9 sections). Place your subject on/near the imaginary lines where they intersect.
Number 7:
For action shots – use fast action (pet/sports modes), and take continuous/burst photos. You will end up taking a lot of pics, but just might get that special one.
For action shots – use fast action (pet/sports modes), and take continuous/burst photos. You will end up taking a lot of pics, but just might get that special one.
Number 8:
Take photos from your pet’s perspective. Most people take photos of their pets whilst standing. This often means you are leaning over your pet (which may make them uncomfortable), results in the pets being too far away, and doesn’t offer that unique pet eye view version. Instead get down low, and take photos looking up at your pet or at the same height as them.
Observe their body language – if they are uncomfortable, back off and try another time.
Number 9:
Attempt to focus on your pet’s eyes/face. As humans we are naturally drawn to look at eyes. Having a clear/crisp photo of your pet’s eye/s can make all the difference.
Get in close with the help of a zoom lens.
Attempt to focus on your pet’s eyes/face. As humans we are naturally drawn to look at eyes. Having a clear/crisp photo of your pet’s eye/s can make all the difference.
Get in close with the help of a zoom lens.
Number 10:
Take lots of photos. You may only get 1 or 2 good photos out of any photos session, but it will be those photos that give you that big smile in years to come.
With today’s digital technology you can delete any photo that isn’t up to scratch.
If you want to learn more, why not take a photography course.
Or if you are looking for an amazing photo, talk to a pet photographer and arrange a photo shoot.
I have personally used and will vouch for both Zoo Studio – Animal Art Photography and Charlotte Reeves Photography.